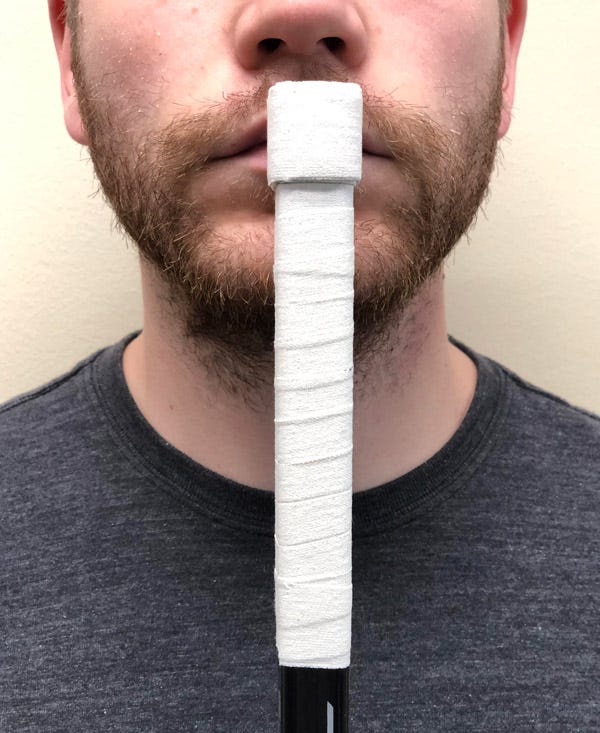
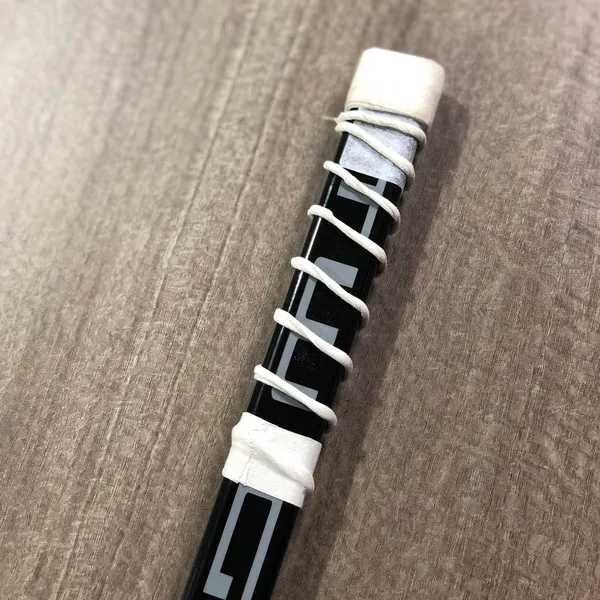
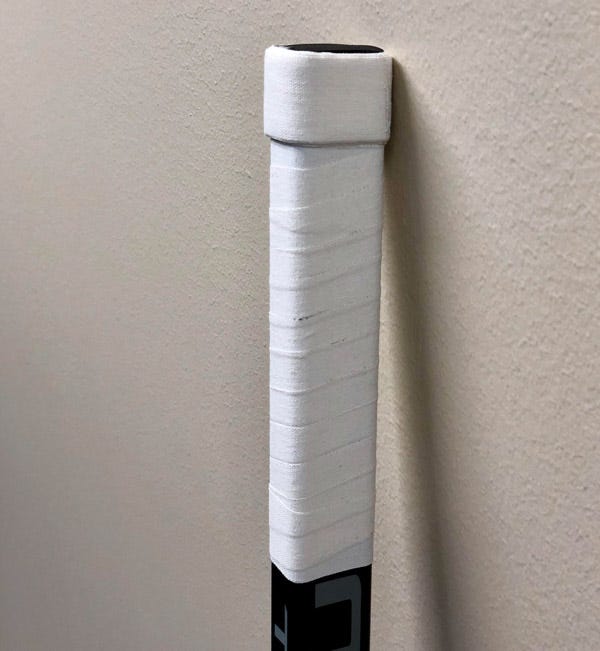
To tape the top of a hockey stick, start by wrapping the tape around the end, then create a knob. Continue to spiral the tape down the shaft for grip.
Taping the top of a hockey stick is crucial for enhancing grip and control during play. Properly applying tape ensures better handling and can improve your performance on the ice. Begin by selecting a high-quality hockey tape that suits your preferences.
Start wrapping the tape around the end of the stick, creating a knob that prevents your hand from slipping. Continue spiraling the tape down the shaft to provide additional grip. This method not only enhances control but also protects the stick from wear and tear. Regularly re-tape your stick to maintain optimal performance and grip.
Materials Needed
Before you start taping the top of your hockey stick, gather all the necessary materials. Having everything ready will make the process smooth and efficient.
Tape Types
Choosing the right tape is crucial for a good grip. Here are the types of tape you can use:
- Cloth Hockey Tape: Durable and provides excellent grip.
- Grip Tape: Sticky and offers extra hold.
- Shin Pad Tape: Thinner and often used for additional layers.
Additional Tools
Besides tape, you may need some extra tools to tape the stick properly:
| Tool | Purpose |
|---|---|
| Scissors | To cut the tape neatly. |
| Hockey Wax | To add grip and protect the tape. |
| Ruler | For measuring tape length. |
Having these tools will make your taping job easier and more precise.

Credit: www.goaliemonkey.com
Preparing The Stick
Properly taping the top of a hockey stick ensures a better grip. The first step is preparing the stick. This involves a few crucial steps to make sure the tape adheres well and lasts longer.
Cleaning The Surface
Before you start taping, clean the stick’s surface. Use a damp cloth to wipe off any dirt and debris. This ensures the tape sticks properly. Dirt and dust can make the tape less effective.
Drying The Stick
Once the stick is clean, make sure it is completely dry. Use a dry cloth to remove any moisture. You can also let the stick air dry for a few minutes. Moisture can prevent the tape from sticking well.
Starting The Tape
Taping the top of your hockey stick is crucial. It improves your grip and control. This guide helps you start the tape job right.
Choosing A Starting Point
Before you start, decide where to begin the tape. Most players start about an inch from the top of the stick. This spot offers the best grip.
Initial Wrap Techniques
Use a clean, dry stick for the best results. Hold the tape roll in one hand. Start at your chosen point. Begin wrapping the tape around the stick.
- Wrap the tape snugly, but not too tight.
- Overlap each layer by half the tape’s width.
- Ensure the tape lays flat without wrinkles.
Continue wrapping until you reach your desired length. A common length is 6-8 inches. This length gives good coverage and grip.
| Step | Action |
|---|---|
| 1 | Choose a starting point |
| 2 | Hold the tape roll |
| 3 | Begin wrapping around the stick |
| 4 | Overlap each layer by half |
| 5 | Wrap until the desired length |
Once you finish, press down on the tape. This ensures it sticks well. Now you have a solid start to your tape job.
Credit: www.quora.com
Creating The Knob
The knob at the top of a hockey stick is crucial. It provides better grip and control. This guide will teach you how to create a perfect knob. Follow these simple steps to enhance your game.
Building The Base
Start by wrapping the tape around the top of the stick. Make sure the tape is tight. The tape should cover about 1 inch of the stick.
Create a small ridge by overlapping the tape. This ridge will serve as the base for the knob. Make sure the ridge is even. This will make the knob more comfortable.
Securing The Knob
Now, begin wrapping the tape over the ridge. Wrap the tape tightly around the stick. Continue wrapping until the knob reaches your desired size.
Once the knob is the right size, wrap the tape down the shaft. This will secure the knob in place. Ensure the tape is smooth and even.
Wrapping The Shaft
Wrapping the shaft of a hockey stick is crucial for grip and control. A well-taped shaft can enhance your gameplay and prevent slips. Follow these steps to ensure your stick is ready for action.
Overlap Method
The Overlap Method is popular for taping the shaft. Begin by placing the tape at the top of the shaft. Start wrapping the tape in a spiral manner. Ensure each wrap overlaps the previous one by half its width. This overlap provides a smooth and consistent grip.
Continue wrapping until you reach the desired length. Many players prefer taping down to the midpoint of the stick. Once you reach this point, cut the tape and press it down firmly.
Tension Control
Maintaining proper tension control while wrapping is key. Too tight, and the tape may wrinkle or tear. Too loose, and it may unravel during play. Keep a steady hand and apply moderate tension.
Check your work periodically to ensure the tape remains smooth. Adjust if necessary to maintain even tension. This will result in a professional-looking and durable tape job.
Adding Grip Enhancements
Adding grip enhancements to your hockey stick can improve your game. Enhancements ensure better control and feel. This section explains the best ways to add grip to your stick.
Grip Patterns
Creating grip patterns on the stick’s top helps players hold it firmly.
- Candy Cane: Wrap tape in a spiral pattern. Leave gaps between spirals.
- Ridge Grip: Make small ridges by overlapping tape layers. This adds texture.
- Knob: Add extra tape at the top. This creates a knob for better grip.
Wax Application
Applying wax to your taped stick can make it even grippier.
- Choose a hockey stick wax. Some waxes have a tacky feel.
- Rub the wax on the taped area. Cover it evenly.
- Test: Hold your stick and check the grip. Add more wax if needed.
Benefits of waxing include:
| Benefit | Explanation |
|---|---|
| Better Grip | Wax adds a tacky feel, preventing slip. |
| Water Resistance | Wax repels water, keeping tape dry. |
Finishing Touches
Once you’ve wrapped the main part of your hockey stick, it’s time for the finishing touches. These final steps ensure your tape job is secure and smooth. This makes your stick ready for action.
Securing The End
To secure the end of the tape job, you need to focus on the tip of the stick. This part takes a lot of wear and tear. Follow these steps:
- Wrap the tape around the top edge of the stick.
- Make sure the tape covers the end completely.
- Press down firmly to ensure the tape sticks well.
This will keep the tape from peeling off during play. A well-secured end helps you maintain a firm grip.
Smoothing The Tape
After securing the end, the next step is smoothing the tape. This helps remove any air bubbles or wrinkles. Here’s how to do it:
- Use your hands to press down on the tape.
- Start from the top and work your way down.
- Apply even pressure to ensure the tape is smooth.
A smooth tape job improves your control over the stick. It also makes the stick look clean and professional.
| Step | Description |
|---|---|
| 1 | Secure the end by wrapping tape around the top edge. |
| 2 | Smooth the tape to remove air bubbles and wrinkles. |
By following these steps, your hockey stick will be game-ready. The finishing touches are key to a durable and effective tape job.

Credit: carterhockey.com
Common Mistakes
When taping the top of a hockey stick, many make common mistakes. These errors can affect your performance. Let’s explore some frequent mistakes and how to avoid them.
Avoiding Air Bubbles
Air bubbles can ruin your tape job. They make the grip uneven. To avoid air bubbles:
- Stretch the tape slightly as you wrap it around the stick.
- Press down firmly on the tape as you go.
- Use your thumb to smooth out any bubbles.
If you find air bubbles, remove that section and re-tape it.
Preventing Loose Ends
Loose ends can make your tape job come undone. To prevent loose ends:
- Start with a clean stick. Remove old tape and residue.
- Wrap the tape tightly around the stick.
- Finish with a small overlap at the end of the tape.
Press the end down firmly to secure it.
Conclusion
Taping the top of a hockey stick is simple with the right steps. Follow the guide for a better grip. Your performance will improve on the ice. Practice makes perfect, so keep taping regularly. Enjoy the game with enhanced control and confidence.
Happy playing!


